
Contouring in
three quick steps
Contour. It’s the beauty equivalent of Beyoncé; hugely popular in the beauty world and very much here to stay. But is it difficult to achieve? As Emma Charlotte Bangay discovers, you don't need a whole range of products and brushes to see the results. Here’s how to tackle contouring in three simple steps.
Add darkness
Always use a contour kit, so that all tones and textures complement each other. I can’t go past Contour Cosmetics Contour Compact.
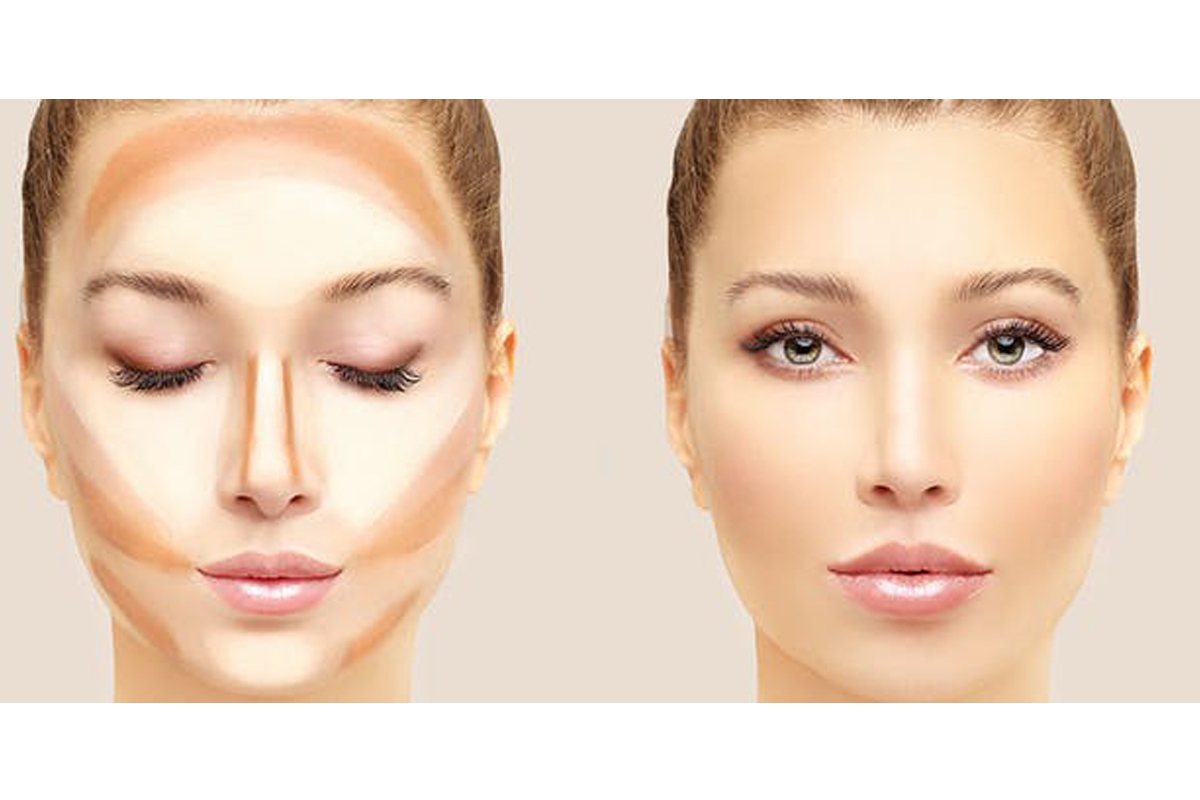
When contouring, you should know that adding a dark colour to your face gives depth and shape to that area. So, where there is fullness and a lack of definition, you want to go dark.
In my case, this included down the hollow part of the cheek, the sides of the nose, along the jawline and the tip of the nose to the cupids bow of the lip. Areas were sharpened and accentuated instantly.
The result? Scary. But nothing some subtle blending couldn’t remedy!
Blend and diffuse
You may have been heavy handed with your contour, so now is the time to make light work of any product sitting on your complexion.
Extend and diffuse the darkness with a clean makeup brush, always blending downwards in the way of any fine facial hair growth in circular motions.
You can use your fingertips to blend down the sides of the nose. To best assess if you’ve applied it exactly where you wish, stand in the light and see if the darkened areas absorb and hold the light, pronouncing and sharpening the higher points of the face.
Get glowing
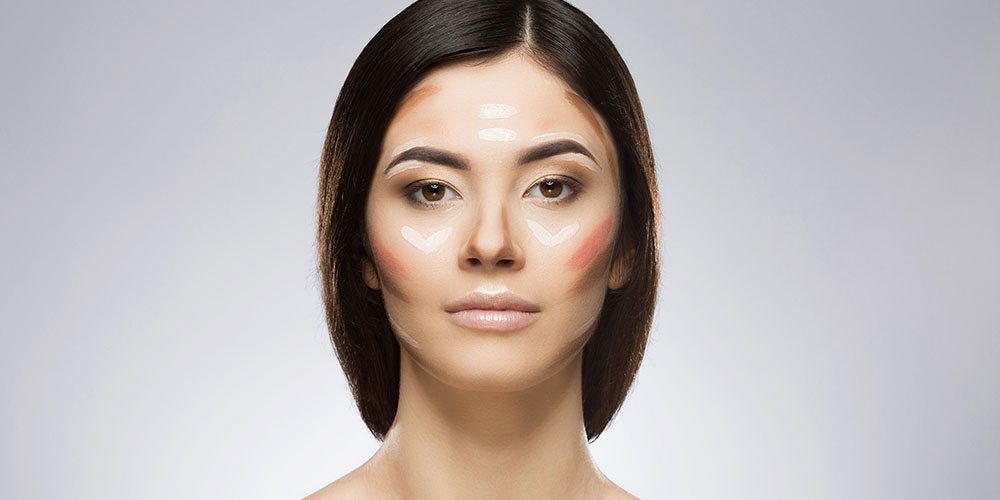
The good news is that the hard work is done. Adding the highlight to your face is much more intuitive. Identify the high, fleshy points of the face (the brow bone, length of the nose, cheeks and temples) - this is where you want to add your light-contouring product.
These very spots are where the light will hit and bounce, pronouncing your features.
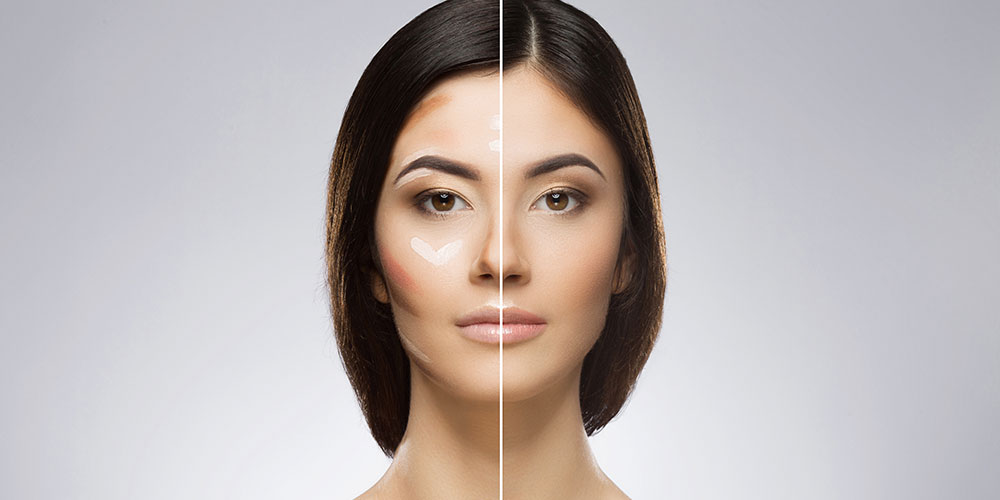
If using a cream, apply with warmed fingertips and blend with a make-up brush. Blend until you're confident all of the product has been worked into the skin.
Also, be sure to pop lighter shades along the length of the nose - stopping at the tip to avoid elongating the nose - and directly under the eyebrow on the brow bone. This will create a lifted arch. The result should be a beautiful, subtly-sculpted visage.


Related
The $3 pantry product that works wonders on your hair and skin
We're calling it: Bi-carb soda is the unsung hero of your household.

Can this therapy cure your sleepless nights?
Suffering from regularly disrupted sleep? Float Therapy could be your ticket to a peaceful slumber.

6 Simple Steps To Perfect Brows
Thanks to bushy-browed celebrities like Cara Delevingne and an explosion of innovation in products,
6 foods to eat for gorgeous winter skin
Winter has well and truly arrived and for many of us, this means, months of dry and irritated skin.